Creating and Running a cBot
Action Map
The following diagram showcases the action flow of creating and running a new cBot.
graph TB
  B([Add a New cBot]) ==> C([Edit the Sample Code]);
  C ==> D([Save and Build Your cBot]);
  D ==> E([Create and Customize a cBot Instance]);
  E ==> F([Run a cBot Instance]);
Add a New cBot
Click on the 'New' button to the right of the search bar. The following window should open.
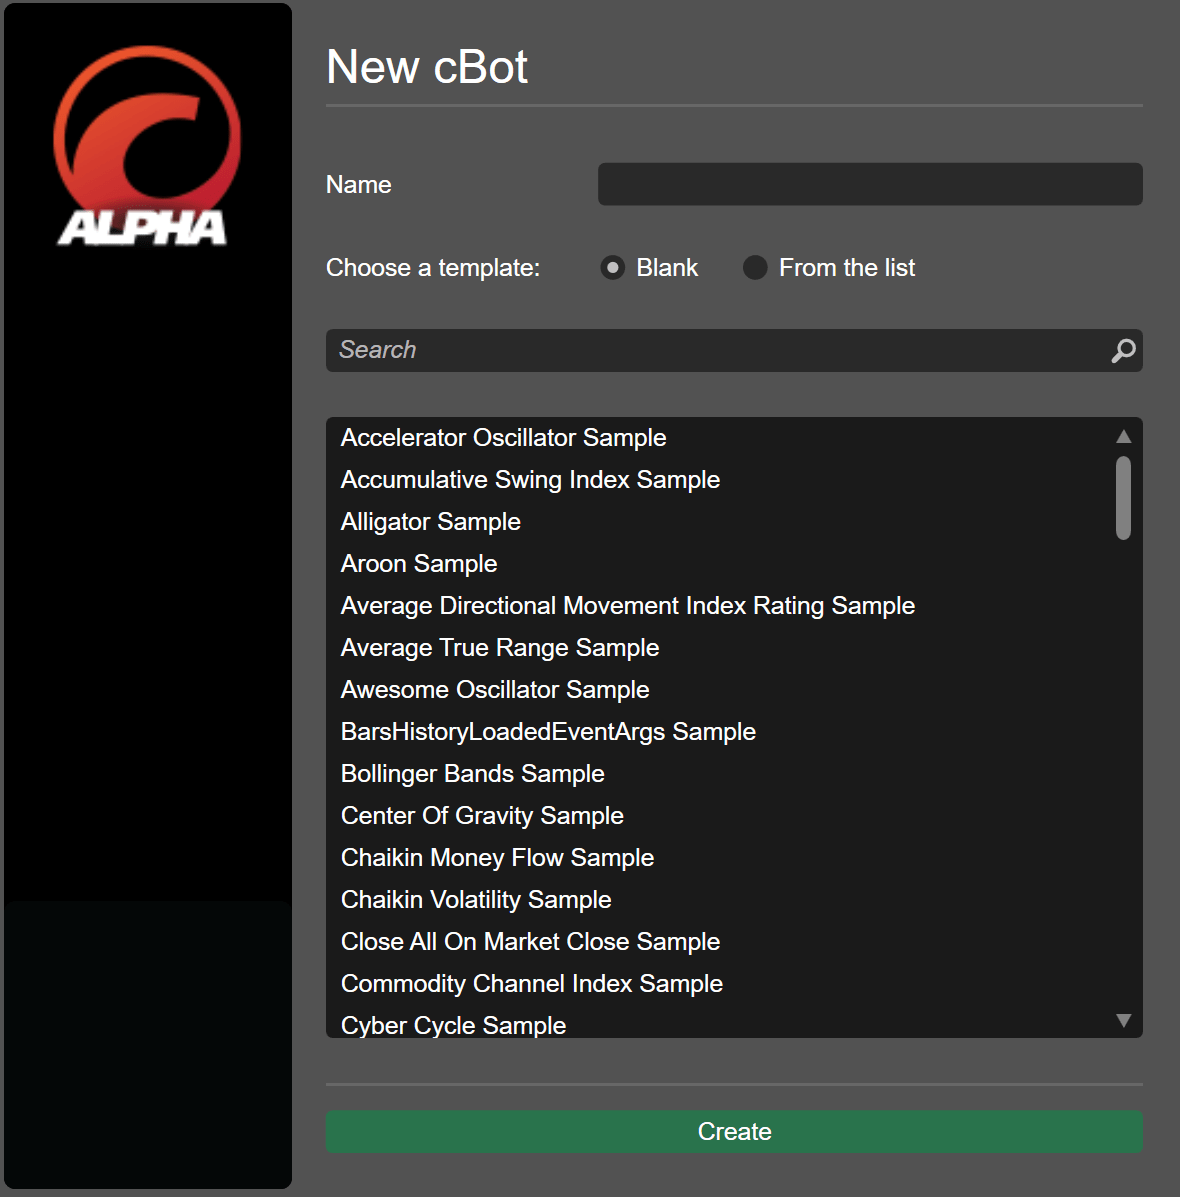
Type the cBot name and select between two options.
- 'Blank'. If this option is chosen, the new cBot will contain only a basic template.
- 'From the list'. If this option is chosen and a cBot is selected from the list below, the new cBot will contain the entire code of the chosen algo. The pre-made cBots in the list cover a wide range of cBot types and automated actions.
Samples Repository
The code samples for the 'From the list' option are taken from the git@github.com:spotware/ctrader-automate-samples.git repository. To access it, click here.
Click on 'Create' to finish setting up the bot.
Note
If you would like to create a similar algo but with a different name, you can always use the duplicate functionality.
Edit the Sample Code
Click on your new bot to open the code editor window. If you have chosen 'Blank' during the previous step, it will contain the following code.
1 2 3 4 5 6 7 8 9 10 11 12 13 14 15 16 17 18 19 20 21 22 23 24 25 26 27 28 29 30 31 32 33 34 35 36 37 | |
Note
If you have chosen 'From the list' during the previous step, your cBot will be ready for action immediately. It will contain detailed trading logic and custom parameters.
As we have discussed previously, the cBot attribute Robot along with its optional properties such as TimeZone and AccessRights, precedes the cBot class (NewcBot) declaration.
The OnStart() method is invoked each time an instance of your cBot is launched. In turn, the OnTick() method is invoked on every tick. Last but not least, the OnStop() method is invoked every time an instance of your new cBot stops operating.
Note that, as the OnTick() method performs a certain action every tick, it is CPU-intensive. In many cases, there is also little practical need for performing a trading operation for every tick, particularly when trading stocks or indices.
Instead, you could replace the OnTick() method with the OnBar() method. As implied by its name, it is only invoked at the opening of every bar, significantly reducing CPU loads.
These are far from the only methods you can use to set up the behaviour of your cBot. However, they are the simplest to use if you are just starting out with C#.
Please refer to the 'References' section to learn more about the classes, methods, and properties you can use when coding cBots. In addition, you can always choose to write custom methods as shown in our introduction to C# and .NET.
Given what you have just learned and the examples provided in other parts of this documentation, edit the code of your cBot to suit your requirements.
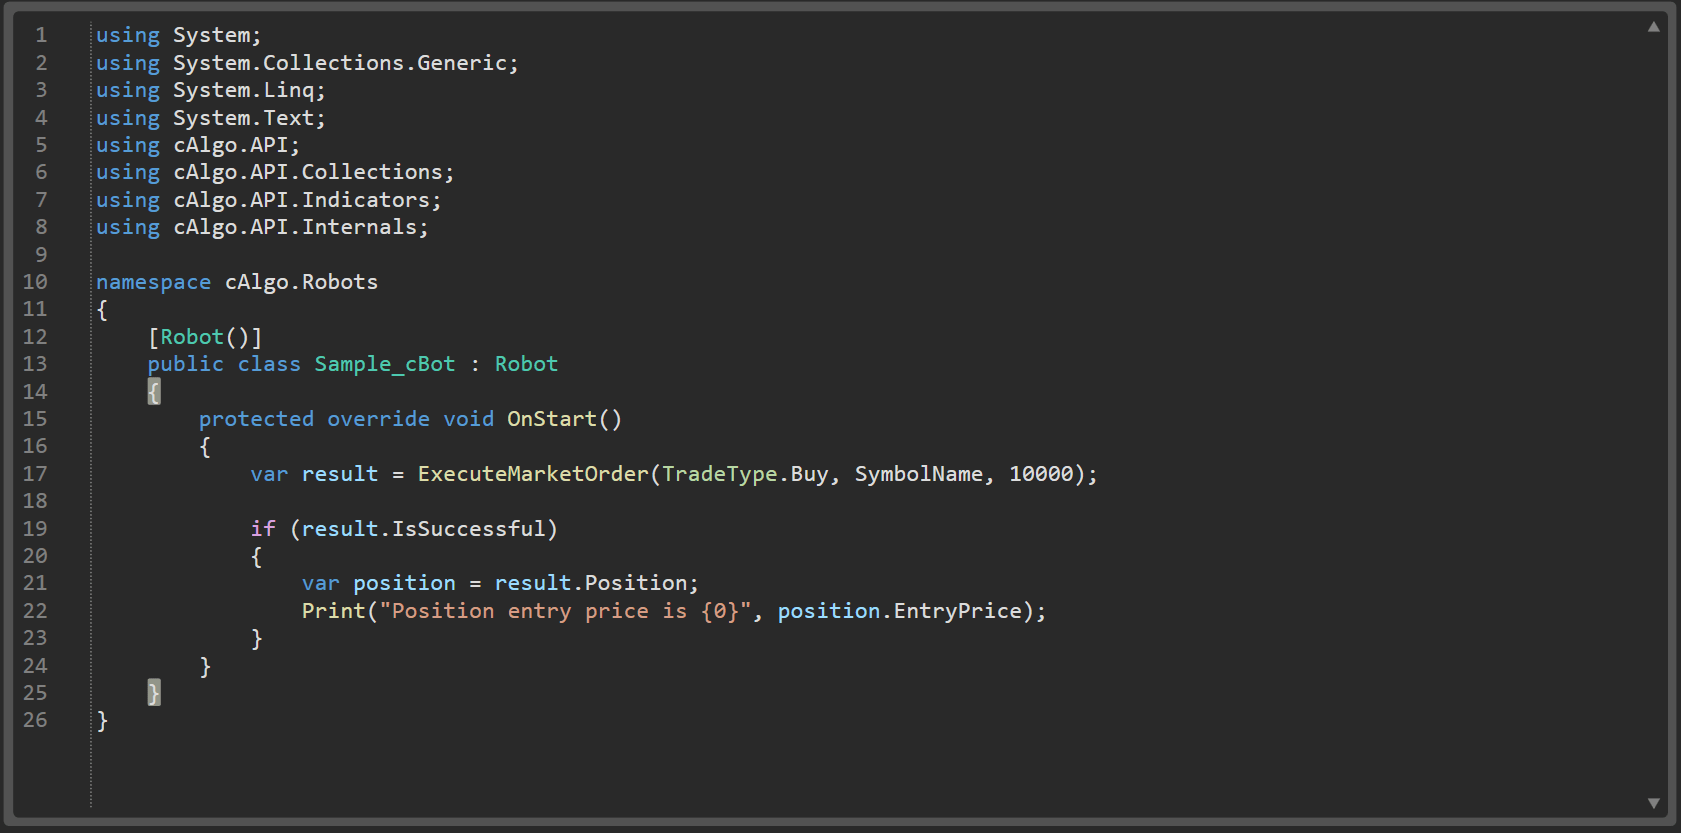
To replicate the screenshot, you can copy and paste the below code after the namespace declaration.
1 2 3 4 5 6 7 8 9 10 11 12 13 14 | |
Save and Build Your cBot
Save your code by clicking on the 'Save' button located above the code editor window. Alternatively, press Ctrl+S. You can also right-click anywhere in the code editor and choose 'Save' from the newly opened menu.
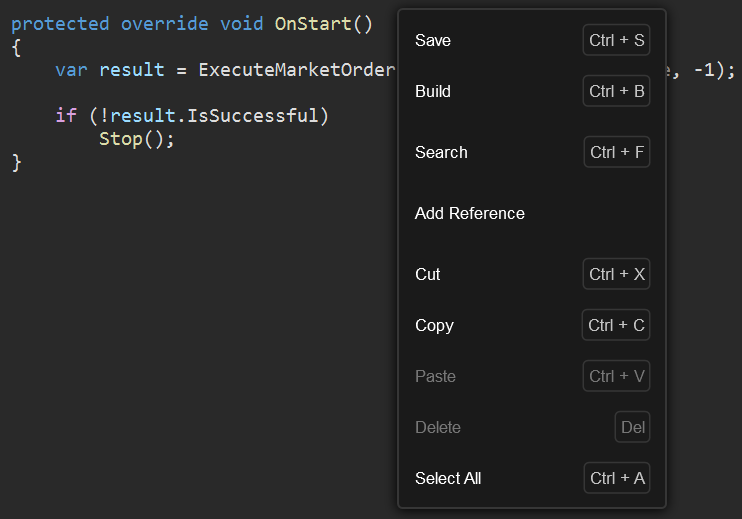
Before you can use your code, you need to convert it into a working cBot. To build a cBot, click the 'Build' icon at the top of the code editor or in the cBot menu. The keyboard shortcut for this action is Ctrl+B.
If the build succeeds, a message confirming this will appear in the 'Build Result' viewer. If the build fails, this window will, instead, display a summary of all errors encountered when the build action was performed. Clicking on an error description in the 'Build Result' viewer will show you the exact place in your code where this error occurs.
If there are changes to your code made since the last build, you should see a red asterisk sign next to the 'Build' icon. In this case, build the bot again before running it.
Create and Customize a cBot Instance
If you have successfully completed all of the above actions, your cBot should be ready for action. To start using it, create a new instance by performing one of the following actions.
- Click on the '+' icon to the right of the extension name. In the menu that appears, select a symbol that you would like to trade.
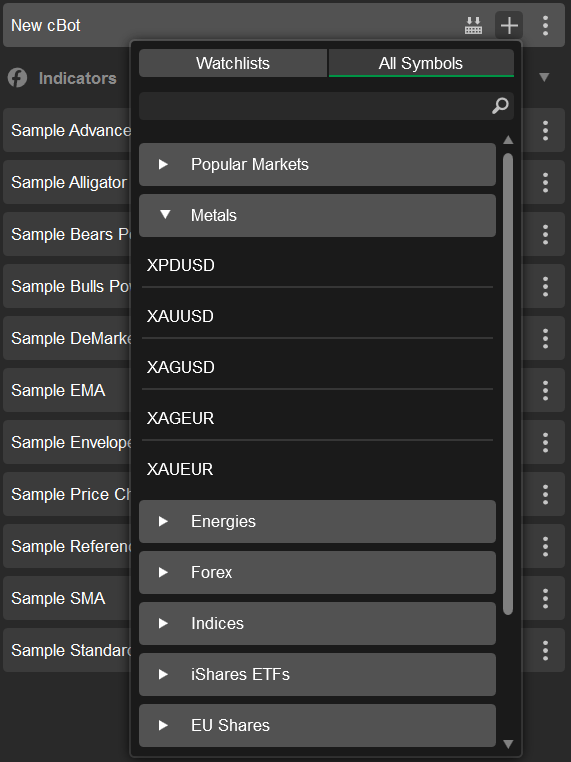
- Click on the 'three dots' icon to the right of the cBot name and select 'Add Instance'. cTrader will automatically create a new instance trading the EURUSD symbol (or a similar symbol) using h1 as the timeframe of the candlestick chart on which the instance is supposed to run on.
You should see a new instance located directly below your cBot.

If you have specified any customizable parameters in your code, they will be listed in the 'Parameters' tab located to the left of the 'Trade Watch' display. Before running an instance, make sure that these parameters match your requirements.
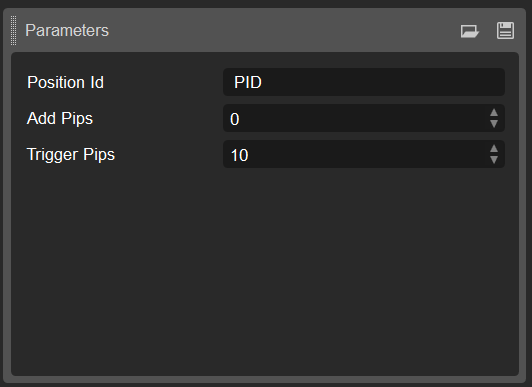
You can save your current parameter values to a locally stored .cbotset file by clicking on the 'Save' icon in the upper-right corner of the 'Parameters' tab.
Alternatively, you can upload parameter values from an already existing .cbotset file by pressing the 'Folder' icon.
Run a cBot Instance
To run the newly created instance, press the 'Start cBot' button to the right of the instance name. If this is your first time using cBots, you will see a warning window. Check the "**I understand how algorithmic trading works...**" flag and press 'OK'. If prompted, provide your cBot with the required access rights.

To stop the newly created instance, press the 'Stop' button. Note that you can change the symbol and timeframe for the currently chosen instance but only if it is not running. It is impossible to change the parameters of any currently running instances.