Create a cBot in cTrader
This article outlines the steps to create a trading bot for algorithmic trading in Python or C#, deploy the robot and run it in cTrader.
Tip
Using cTrader Windows or Mac, you can create trading robots quickly, or get assistance from AI.
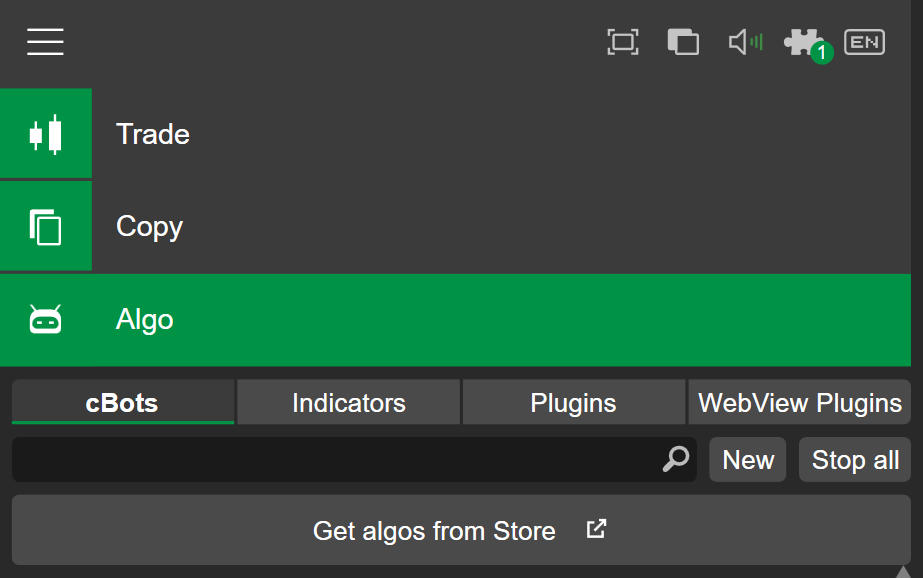
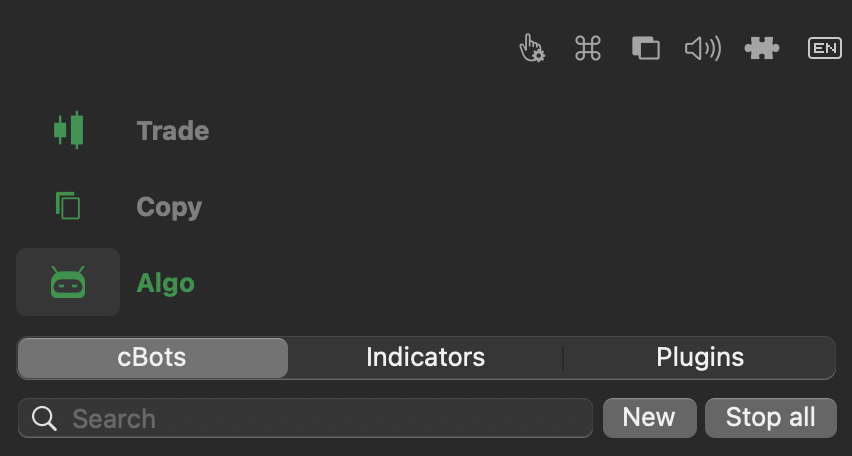
In the cBots tab of the Algo app, click the New button to open the algorithm creation wizard.
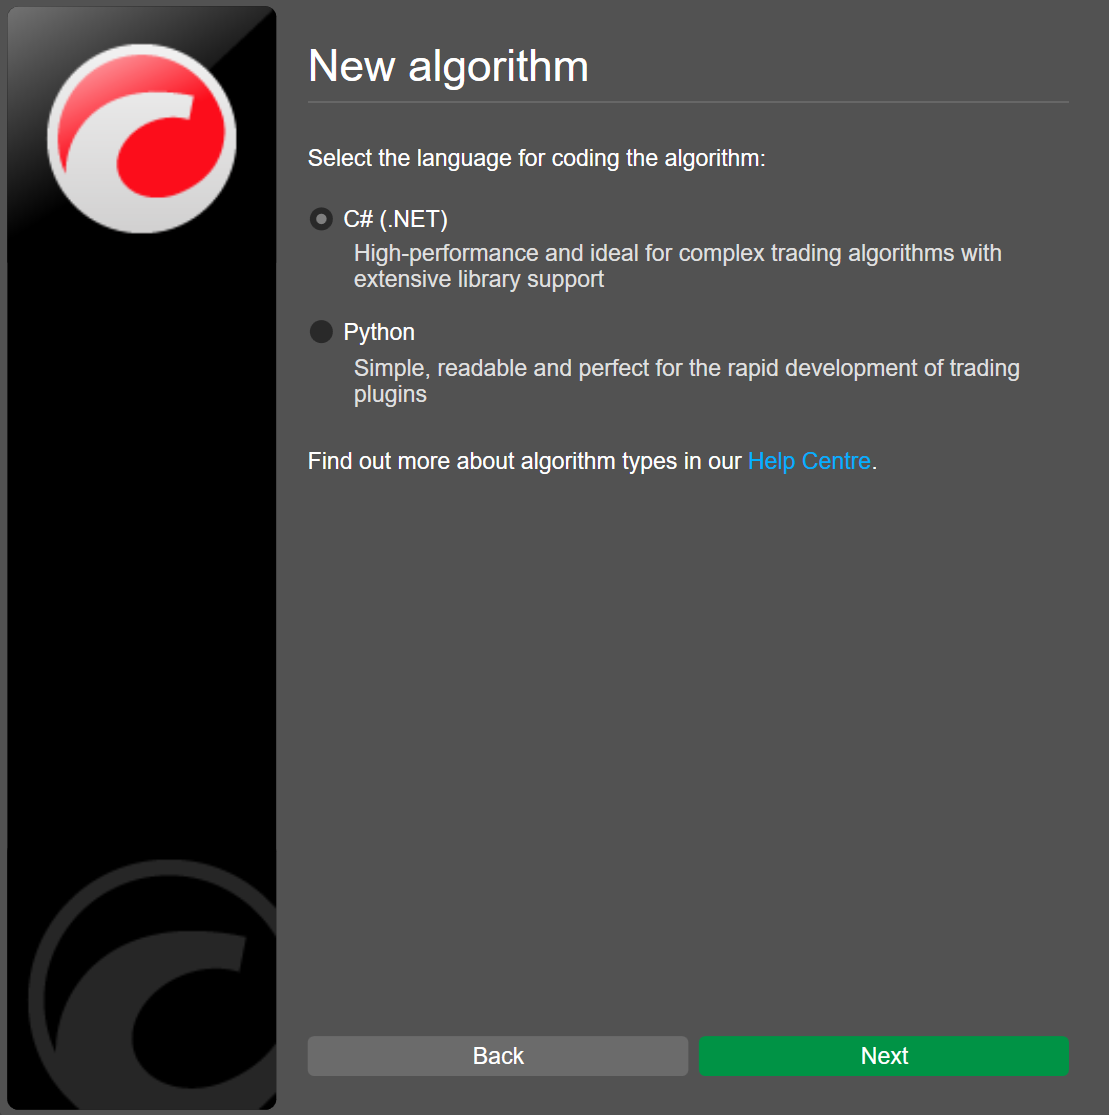
Enter a name for your cBot, then select a programming language between C# and Python.
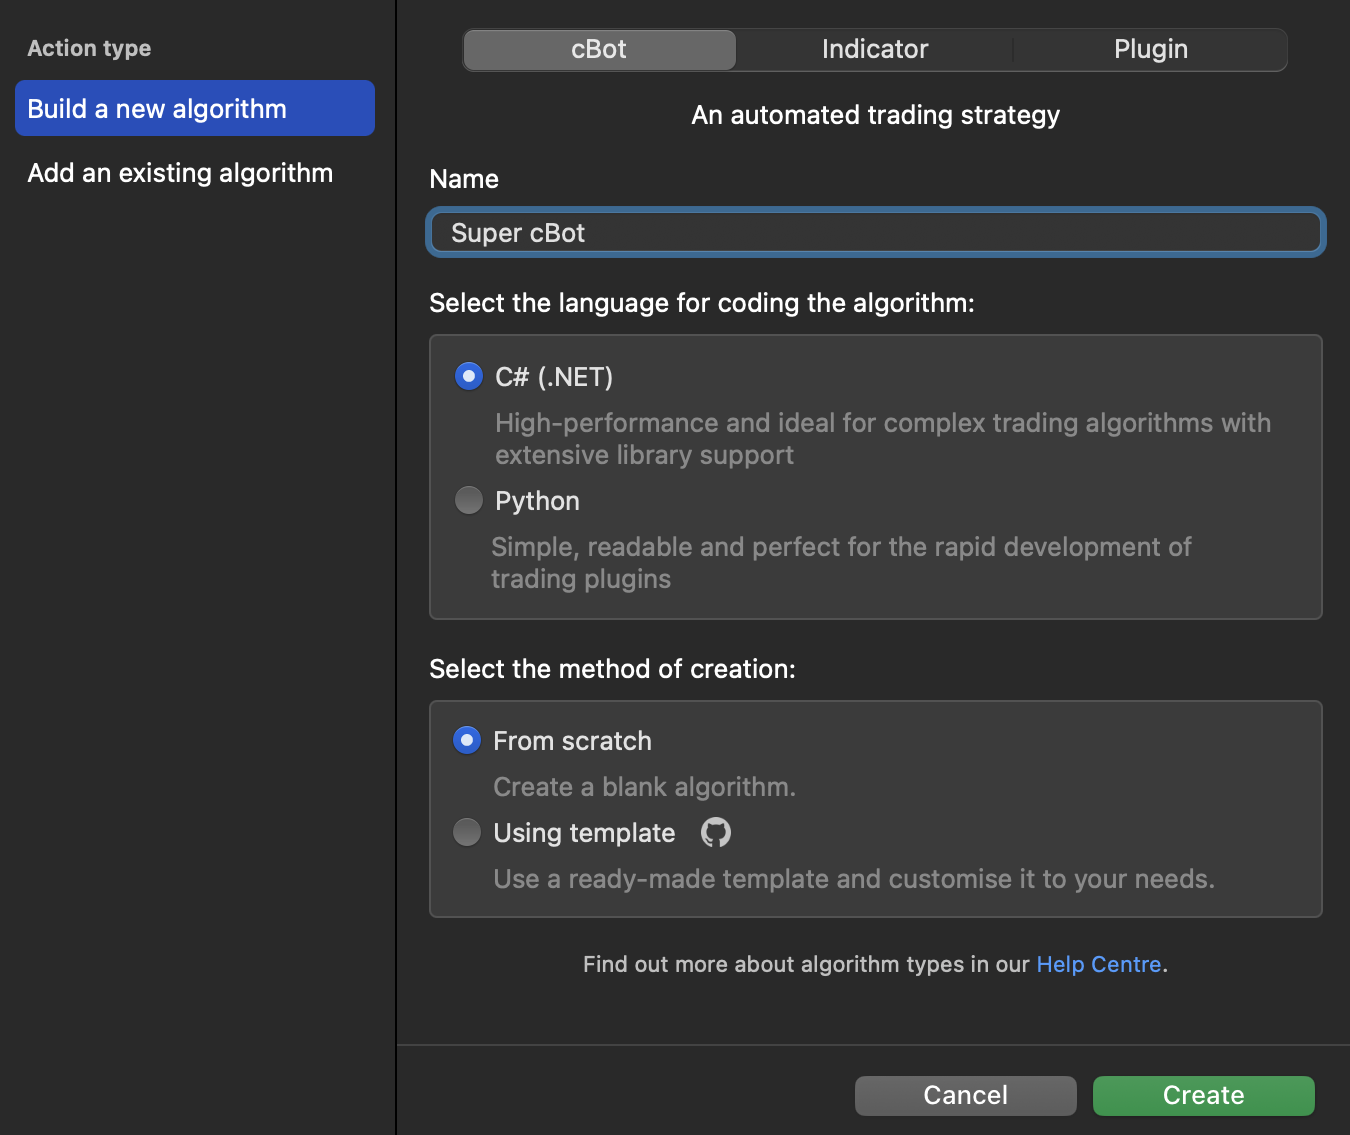
Choose a creation method from:
-
From scratch - the new trading bot will contain only a basic template.
-
Using a template - you will be able to select a premade algorithm from a list of Python# or C# templates, covering a wide range of cBot types and automated trading actions.
Note
Premade algorithms already contain trading logic and customisable parameters. Such cBots are ready to run once you save and build them.
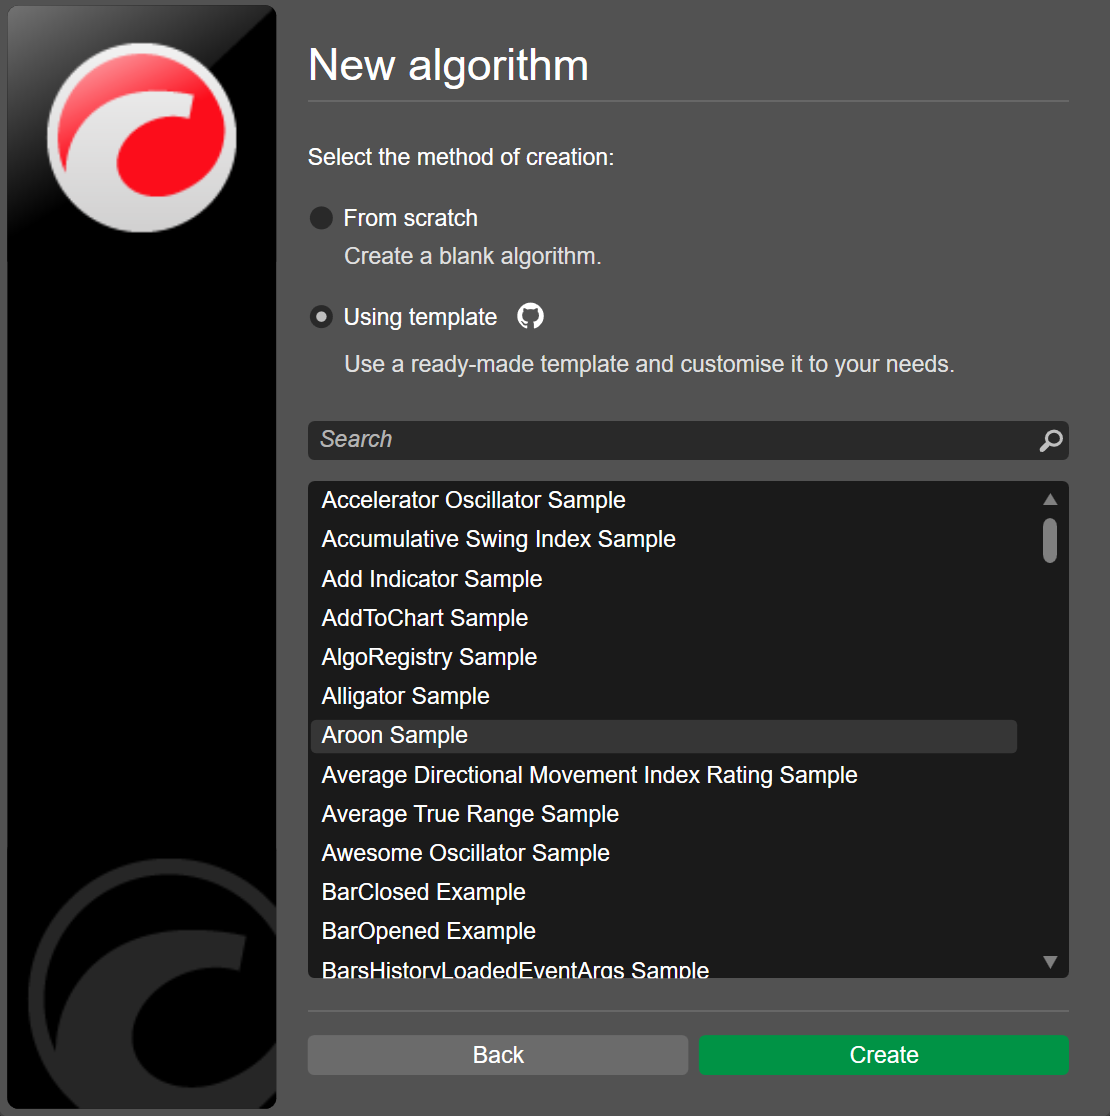

After you click Create, the code editor opens and you can start editing the trading robot's code.
Edit the code
Depending on the creation method you chose, the trading robot sample contains one or more of the following elements:
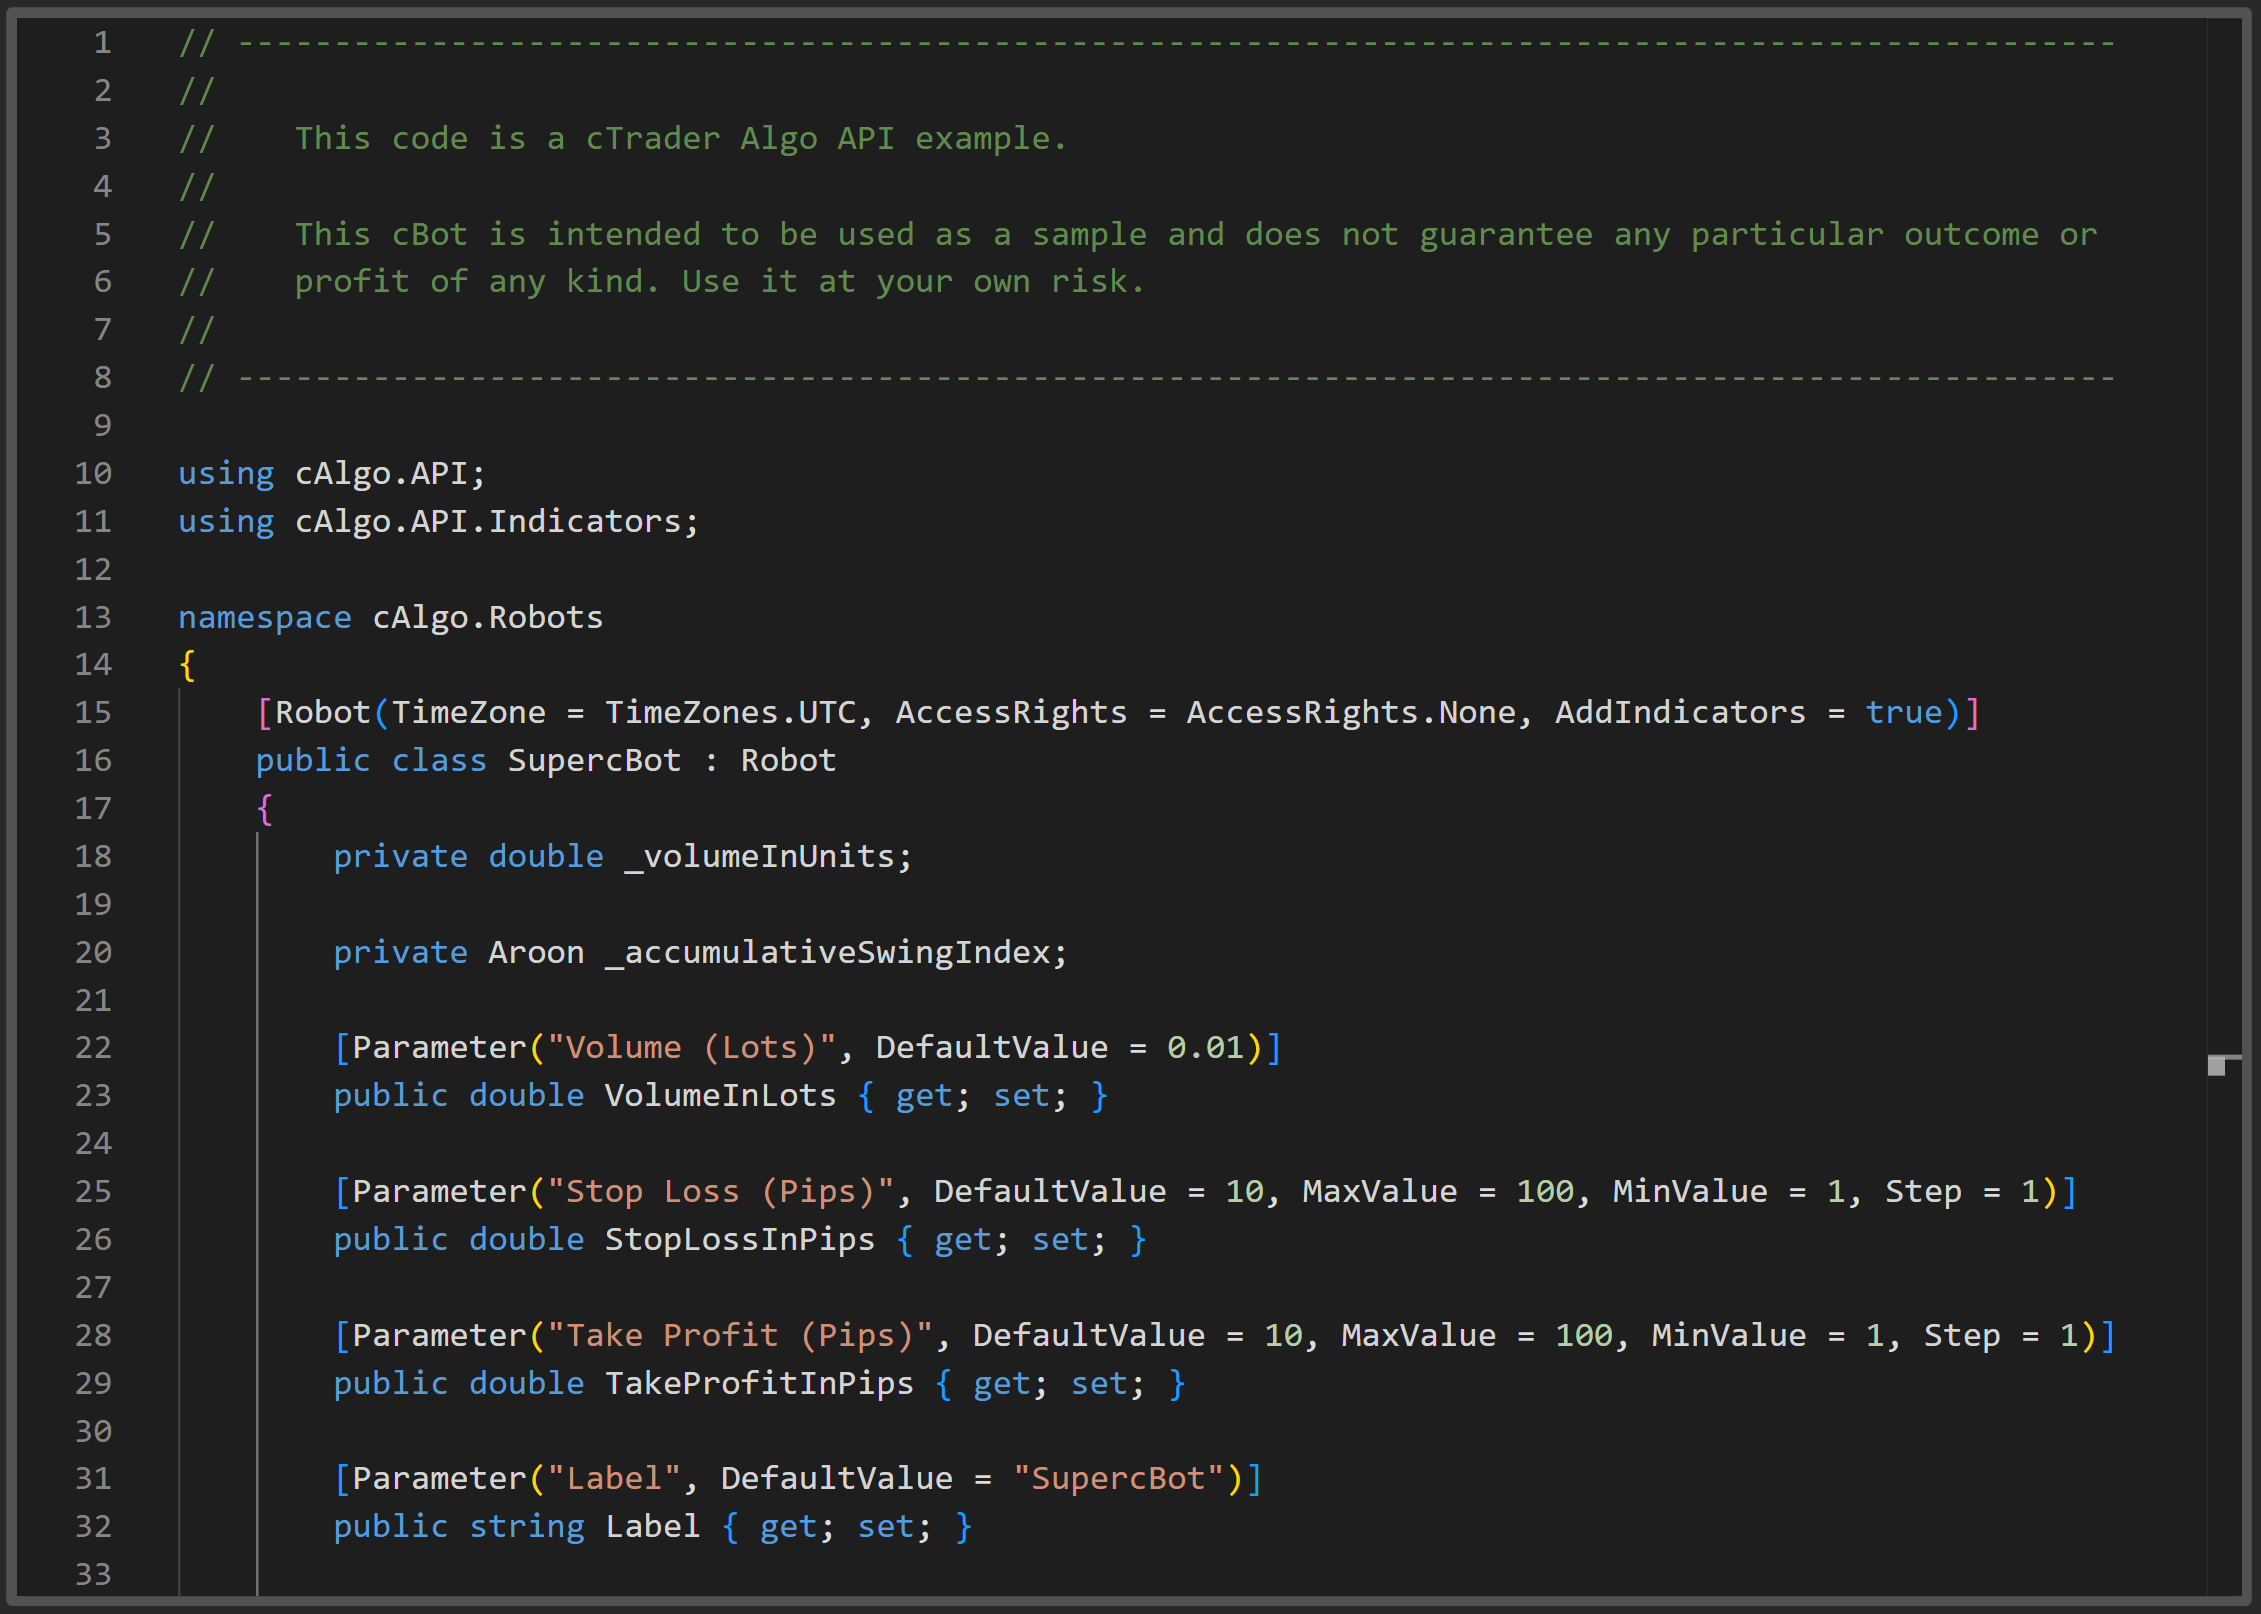
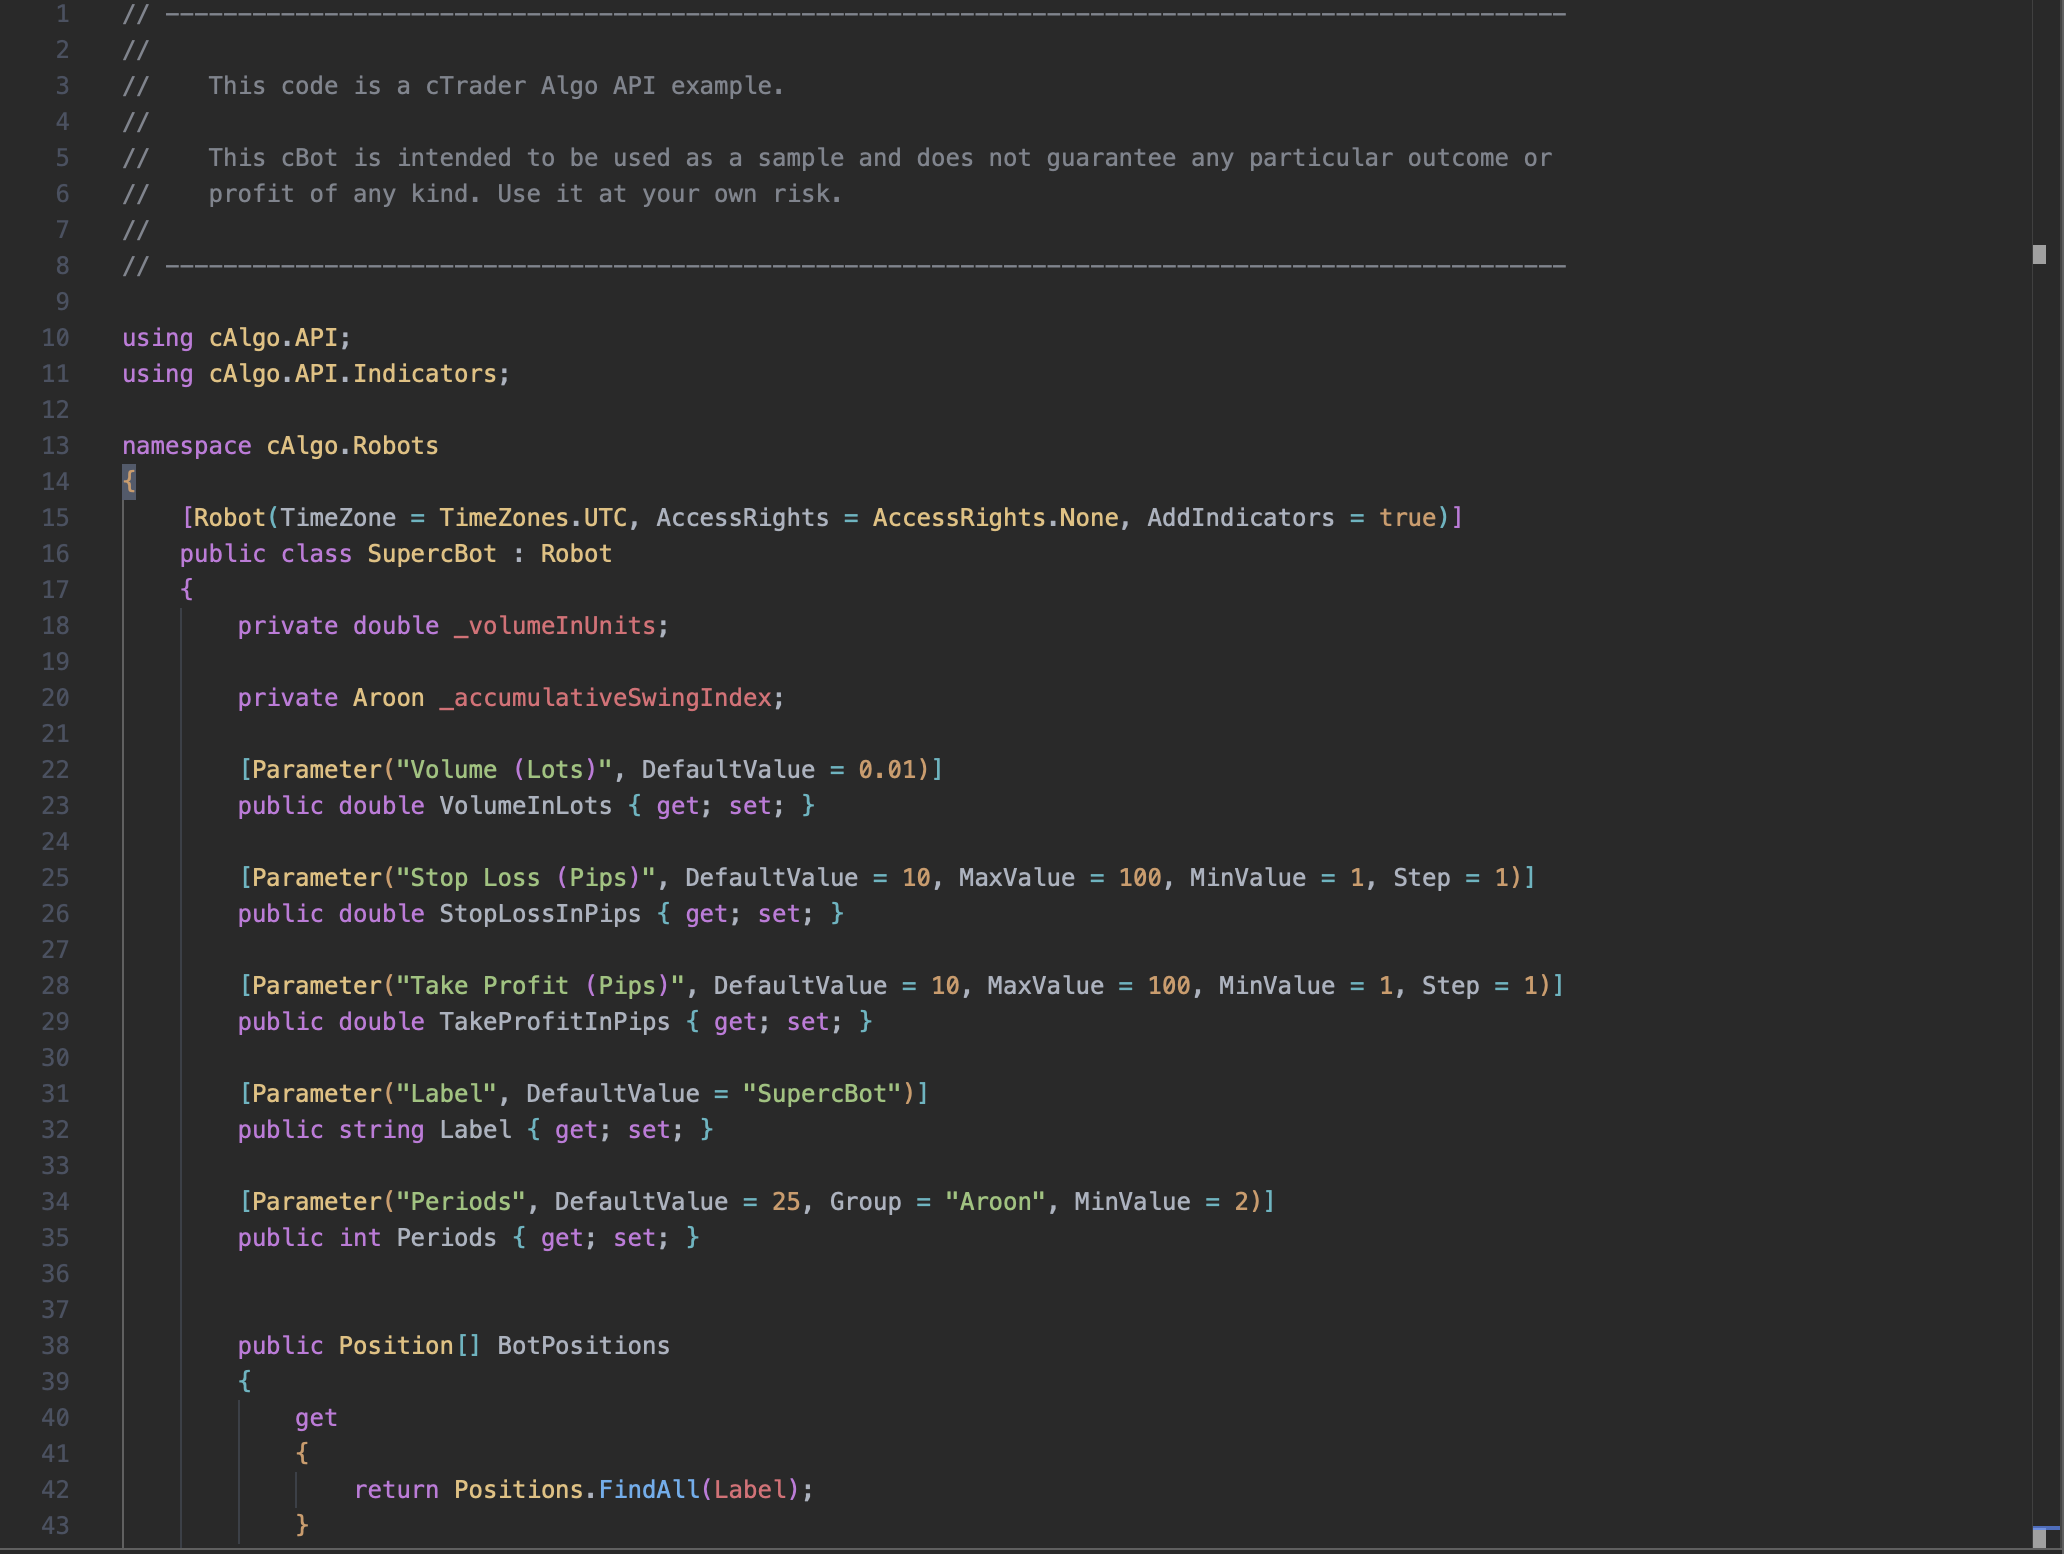
1 2 3 4 5 6 7 8 9 10 11 12 13 14 15 16 17 18 19 20 21 22 23 24 25 26 27 28 29 30 31 32 33 34 35 36 37 38 39 40 41 42 43 44 45 46 47 48 49 | |
The cBot Robot attribute along with its optional properties such as TimeZone and AccessRights, precedes the cBot class (SupercBot) declaration.
These methods are often included by default:
- The
OnStart()method is invoked each time an instance of your cBot is launched. - The
OnTick()method is invoked on every tick. - The
OnBar()method is invoked on every bar. - The
OnStop()method is invoked every time an instance of your new cBot stops operating.
The OnTick() method performs a certain action every tick, which makes it CPU-intensive. In many trading cases, there is little need to perform trading operations on each tick. Using the OnBar() method is more practical.
The methods and code types shown in the example snippet above are not the only way to set up and configure the behaviour of a bot. However, they are the easiest to work with if you are just starting out with coding. To learn more about algorithms, begin with C# basics and explore cBot code examples.
Note
References includes all classes, events, methods, variables, etc. for building algorithms in cTrader, while full algorithm examples and templates are available in a GitHub repository.
1 2 3 4 5 6 7 8 9 10 11 12 13 14 15 16 17 18 19 20 21 22 23 24 25 26 27 28 29 30 31 32 33 34 35 36 37 38 39 40 | |
These methods are often included by default:
- The
on_startmethod is invoked each time an instance of your cBot is launched. - The
on_tickmethod is invoked on every tick. - The
on_bar_closedmethod is invoked on every bar. - The
on_stopmethod is invoked every time an instance of your new cBot stops operating.
The on_tick method performs a certain action every tick, which makes it CPU-intensive. In many trading cases, there is little need to perform trading operations on each tick. Using the on_bar_closed method is more practical.
The methods and code types shown in the example snippet above are not the only way to set up and configure the behaviour of a cBot. However, they are the easiest to work with if you are just starting out with coding. To learn more about algorithms, begin with Python basics and explore cBot code examples.
Apply your new knowledge to edit the trading bot code and adapt it to your needs.
Save and build
Save your code by clicking the Save button at the top of the code editor or use the Ctrl+S shortcut.
Before you can use your cBot, you need to validate its code by building the cBot project. Click the Build button at the top of the code editor or press Ctrl+B.

Save your code by clicking the Save icon at the top of the code editor or use the Cmd+S shortcut.
Before you can use your cBot, you need to validate its code by building the cBot project. Click the Build icon at the top of the code editor or press Cmd+B.

When the build succeeds, you see a confirmation message in Build result. If the build fails, a summary of all errors encountered appears instead.
If there are changes to the code since the last build, an asterisk appears next to the Build icon. In this case, you should build the cBot again before starting an instance of it.
Once you successfully build a cBot, the cBot becomes ready for action, but it starts working only when you start an instance.
