How to create a cBot for cTrader in 5 Minutes
In this article and its corresponding video, we are going to describe a quick way to create a cBot in cTrader Algo. The cBot that we will create will implement a simple trading strategy called Three white soldiers and three black crows. You can learn more about this strategy in our knowledge base.
Before following our instructions, make sure you have downloaded and installed the cTrader Windows or Mac application from the official website. Launch it, and navigate to the cTrader Algo section. You can find it in the left panel. Click the Algo tab, and the cTrader Algo section should appear.
Add a new cBot
Click the New button in cTrader Algo to start creating a new cBot. Enter a name, choose a programming language between C# and Python and continue until the code editor opens.
Add the cBot settings
Before we start implementing a trading strategy, we will take a look at the basic cBots parameters and methods. You can also consult our documentation to familiarise yourself with what different parameters and methods do.
-
cBot parameters – allow you to define configurable attributes such as the traded volume or stop-loss/take-profit distances.
-
cBot methods – define how your cBot behaves when specific events occur. There are four main events you need to handle when developing a cTrader cBot, and each is managed by a corresponding method provided by cTrader. These methods are C#'s
OnStart(),OnTick(),OnBar(),OnStop()and Python'son_start(),on_tick(),on_bar_closed(),on_stop(). Note that the C#'sOnBar()and Python'son_bar_closed()method is not included in the default code template.
The following table defines these four methods in detail.
| C# | Python | Purpose |
|---|---|---|
OnStart() | on_start() | Triggered when a cBot instance starts operating. It is used to initialise any variables you plan to use in your cBot such as indicators, counters, event handlers or timers. |
OnTick() | on_tick() | Triggered on every tick (price update) on the trading chart on which a cBot instance is running. Commonly used for fast-entry or exit logic based on real-time data. Inside this method, you can program custom entry and exit conditions as well as any other auxiliary function you need to run when a new tick arrives. |
OnBar() | on_bar_closed() | Triggered at the close of each bar. Inside this method, you can program custom entry and exit conditions or any other functions that need to run on the formation of each new bar. |
OnStop() | on_stop() | Called when the cBot stops. Used to perform final operations such as closing positions, saving the state and more |
Add the trading logic
We will now add the code for our trading strategy. Our cBot should open a buy position when three green bars are formed on the chart and a sell position when there are three consecutive red bars.
First, we need to define the parameters of our cBot. These parameters will be fully customisable from the cTrader UI. We will define three parameters in our cBot.
- The volume of each trade.
- The stop loss in pips.
- The take profit in pips.
Paste the following code into your code editor just below the curly bracers after the class declaration (public class NewcBot : Robot)
1 2 3 4 5 6 7 8 | |
Note
Python cBots use customisable parameters declared in their .cs files.
1 2 3 4 5 6 7 8 | |
We now need to implement the logic behind our trading strategy. Paste the following code in your OnBar() or on_bar_closed() method. Remember that this method is called every time a new bar is formed.
1 2 3 4 5 6 7 8 9 10 11 12 13 14 15 | |
1 2 3 4 5 6 7 8 9 10 11 | |
Now we will examine the code more closely. cTrader provides access to the chart's historical bars, allowing us to check whether the last three bars are all green or all red, respectively. In the C#'s OnBar() and Python's on_bar_closed() method above, we first check whether the last three bars were all green. We then evaluate whether these bars were all red.
If one of the two conditions is true, we place a market order using the ExecuteMarketOrder() method. It takes several inputs (arguments), with the most important being the trade direction, symbol, traded volume, stop loss, and take profit.
In our case, the order direction (TradeType.Buy, TradeType.Sell) is determined by the trading strategy conditions. The symbol name is taken directly from the chart that our cBot is running on SymbolName. The trading volume, stop loss, and take profit (C#'s Volume, StopLoss, TakeProfit and Python's VolumeInLots, StopLossInPips, TakeProfitInPips) are all retrieved from the cBot parameters we defined.
Build and run the cBot
We now need to check whether our cBot builds successfully. By default, the build result window is located directly beneath the code editor. If you do not see it, click on the Layout button in the top-most bar of the cTrader UI and select Build Result. The keyboard shortcut for this action is Ctrl + W
Afterward, click the Build button located in the topmost bar of the cTrader UI. Alternatively, right-click your cBot and click Build in the newly appeared menu, or simply press Ctrl + B.

If the build is successful, you will see a green message in the Build Result area at the bottom of the code editor.
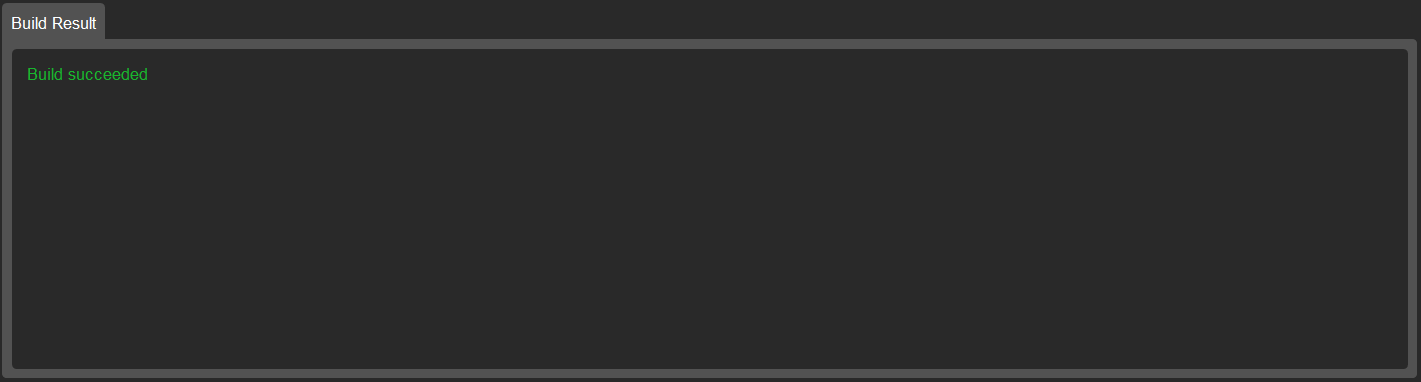
Alternatively, if there are issues with your code, you will see a red message and a detailed summary of all build errors.

After your cBot has been built successfully, you can start using it. All you need to do is add an instance on a trading chart. To do so, simply click the + icon to the right of the name of your cBot. You will see a list of all symbols on which you can run your cBot.
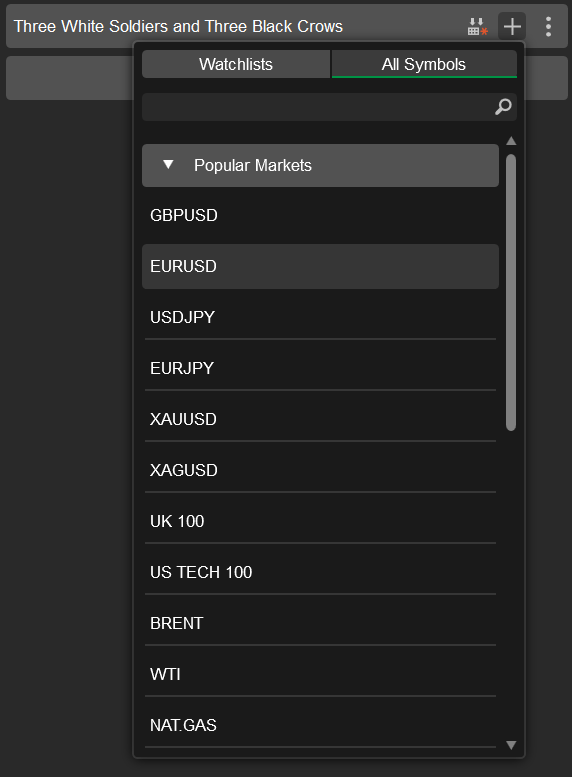
We are going to select EURUSD. After you choose a symbol, a new cBot instance will be added. You will see a new item in the list of cBots with the symbol name and the timeframe you would like to trade.
You should also see the parameters you have coded in the Parameters tab directly beneath the trading chart.
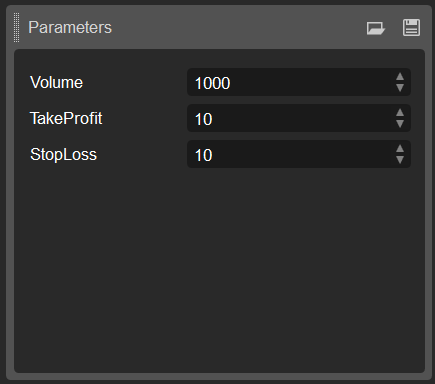
You can change these parameters however you want or simply leave them at their default values.
Additionally, you will see a Play button at the top of the EURUSD chart.
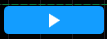
To launch your instance, press this button. Alternatively, a copy of this button is also located to the right of your instance in the list of cBots to the left. Either one of these buttons will start the cBot.
After clicking on either button, you should see it turn orange, meaning that an instance of our cBot is now up and running. In the Log tab, you should also see a new line stating that the cBot has now started.
Backtest the cBot
Our cBot may take a long time to open a position on a real trading chart. We are going to run a quick backtest to see it in action on historical data. To do this, open the Backtest tab.

Use the calendar slider closer to the top of the screen to select the date range that you would like to use for backtesting. Enable the Visual mode flag to track the results of backtesting as they occur.
We are going to move the slider back one month. Click the Play button to launch the cBot on the chosen historical data.
Afterward, you will be able to see new positions being opened and/or closed in the tab immediately below the trading chart and to the right of the Parameters section. Specifically, after detecting either of the two patterns we have coded, the cBot will place a buy or a sell order.
Running a backtest is a useful way to analyse whether your cBot is working correctly.
Summary
We hope that this article has been helpful in demonstrating how you can create an automated trading robot using cTrader.
