Settings
Click Settings in the bottom-left corner to open the settings menu.

Account
Properties
The following settings are available in the Properties section:
- Account number – the trading account number (view only).
- Currency – the currency of the active trading account. This setting can be changed only for a trading account that has never traded.
- Leverage – the leverage allowed for the active trading account.
- Account type – the position accounting model of the active trading account. Available options include Hedging, Netting and others.
- Account name – name of the active trading account for labelling purposes.
- Stop-out type – the margin protection setting of the trading account. Available stop-out types are Fair and Smart.
Tip
The stop-out type applied to your account and its value is displayed in the balance bar at the bottom of Trade Watch.

Note
You can change the account properties only when all the open positions are closed. Also, the availability of the options may depend on your broker.
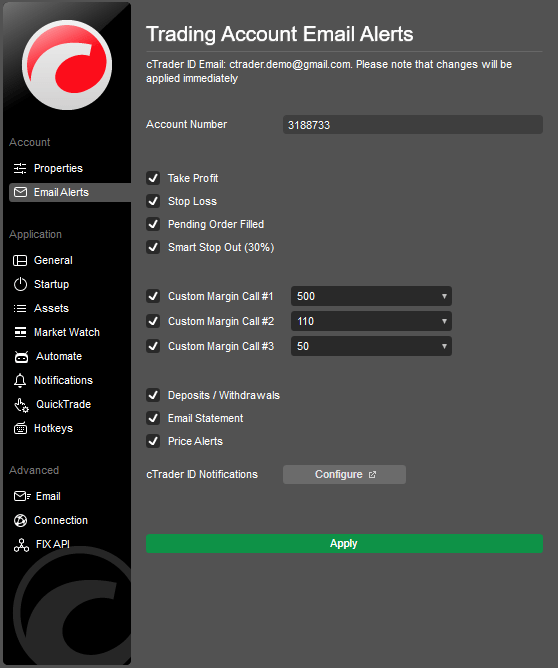
Email alerts
Select the desired items from the Email alerts section to enable email notifications for the corresponding events:
- Take profit – each time a position reaches the take-profit level.
- Stop loss – each time a position reaches the stop-loss level.
- Pending order filled – each time a pending order is filled.
- Smart stop-out – each time the margin falls below the stop-out level.
- Custom margin calls – each time any of the three manually set margin calls is triggered.
- Deposits/withdrawals – each time a funds transfer occurs on the account.
- Email statements – trading account statements.
- Price alerts – sends an email notification when the price alerts are reached.
Note
These settings will apply only to the current trading account.
Keep in mind that each custom margin call is triggered only once, then turns off automatically.
Application
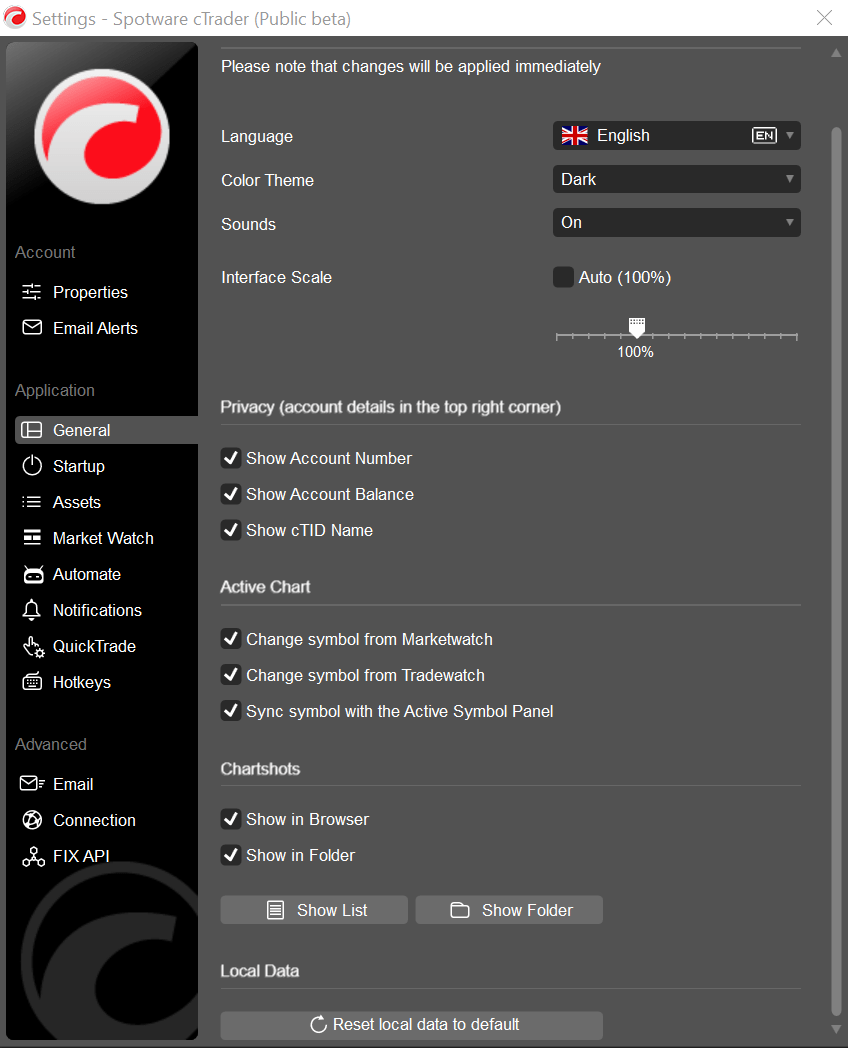
General
The general cTrader application settings allow configuring:
- Language – select the desired interface language from the drop-down, then click OK in the pop-up to apply changes.
- Colour theme – select dark or light UI colour theme.
- Sounds – enable or disable application sounds (on by default).
- Interface scale – use the slider to change the scale of the UI, or select Auto to apply 100% scale automatically.
Privacy (all enabled by default)
- Show account number – clear the check box to hide the trading account number.
- Show account balance – clear the check box to hide the balance.
- Show cTID name – clear the check box to hide the cTID.
Active chart
- Change symbol from Market Watch – select to change the active chart symbol from the Market Watch.
- Change symbol from Trade Watch – select to change the active chart symbol from the Trade Watch.
- Sync symbol with the Active Symbol Panel – select to synchronise the active chart symbol with the Active Symbol Panel.
Chartshots
- Show in browser – select to automatically open Chartshots in a new browser tab.
- Show in folder – select to automatically download Chartshots and display them in a folder on your local machine.
- Show list – click to view all previously taken Chartshots in your browser.
- Show folder – click to view all downloaded Chartshots in the folder.
- Local data – click Reset local data to default to reset all settings to default.
Note
General settings are workspace-specific, meaning workspaces saved in cTrader Windows do not apply to cTrader Web, and vice versa.
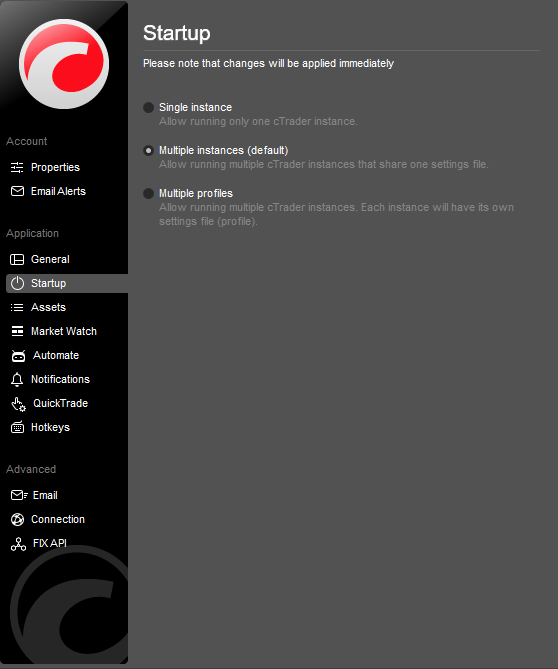
Startup
Each time you run cTrader Windows, the application uses your settings profile, which stores the following information:
- Authorisation token (the cTID you use to log in).
- The last selected trading account.
- The last selected workspace – includes chart settings, Quick Trade parameters, colour theme, layout, language and sound settings, asset display settings, symbols list settings, and in-app notification settings.
- cBots and indicators in cTrader Algo – all running cBots and indicators on your charts are saved until the next cTrader Windows startup.
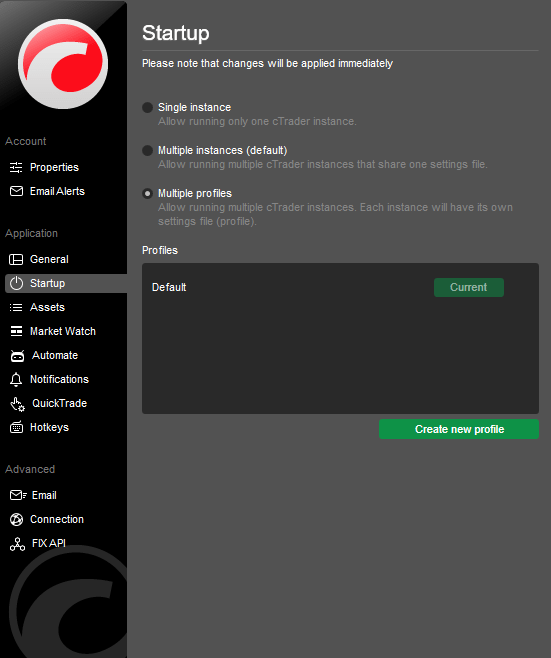
The Startup settings allow selecting how the application will use your settings profile when running more than one instance of cTrader Windows.
-
Single instance – allows running only one cTrader Windows instance at a time. This mode does not permit running two or more instances simultaneously, meaning only one settings profile is used. Use this mode if you do not plan to run more than one instance to avoid settings conflicts.
-
Multiple instances (default) – allows running several cTrader Windows instances that share one settings profile. You can open multiple instances and adjust different settings in each; however, each time you close an instance, its settings profile will overwrite the application’s main settings profile. The next time you start cTrader Windows, it will open with the profile saved from the last closed instance.
-
Multiple profiles – allows running multiple cTrader Windows instances simultaneously, each with its own settings profile. Each instance uses its own authorisation token and all other saved settings, allowing you to log in with different cTIDs, trade from different accounts and operate without conflicts between instances. Use this mode if you need several instances running with separate settings profiles.
To set the multiple profiles startup mode, select Multiple profiles and click Create new profile.
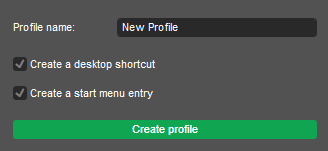
In the New startup profile pop-up, specify the new Profile name, choose whether to create a desktop shortcut or a start menu entry (or both), then click Create profile.
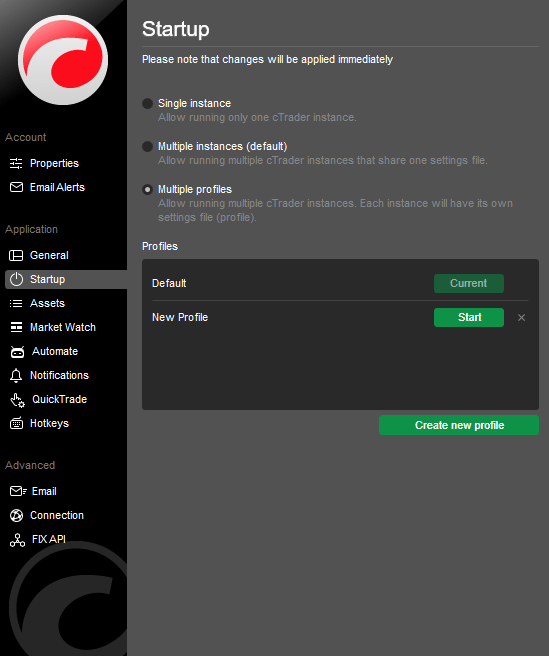
Now your new startup profile is created and you can start a new instance of cTrader Windows by clicking Start next to it from the Profiles list.
Alternatively, start your new cTrader instance from the desktop shortcut.

Or you can launch it from the start menu entry.

Note
The startup mode cannot be changed while two or more cTrader instances are running in multiple profiles mode. When you change the startup mode, the new settings apply automatically and immediately.
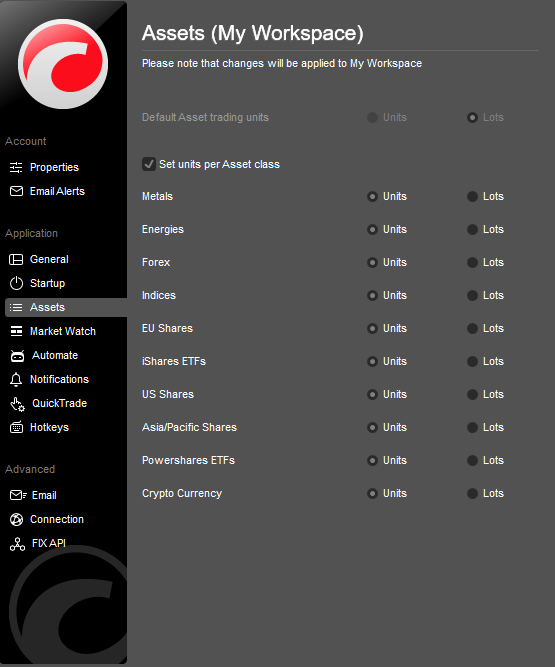
Assets
Set the default asset trading units (units or lots). To configure trading units separately for different asset classes, select the Set unit price per asset class check box.
Note
Trading units are workspace-specific. If you change the workspace, the trading unit settings will return to default.
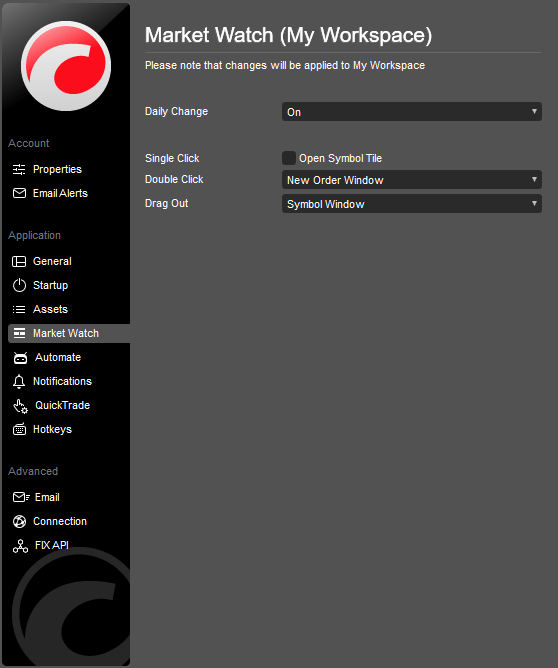
Market Watch
The Market Watch settings allow enabling or disabling the Daily change and the Single click in Market Watch.
- Daily change – displays the difference between the symbol’s previous-day closing price and the current-day opening price directly in the Symbols list.
- Single click – select to apply a double-click action for the symbol tile with DoM or Active Symbol Panel.
- Double click – select to apply a double-click action for the new order window, new chart, new detached chart or to disable double-click.
- Default DoM type – select the standard, price or VWAP default DoM type.
Note
The Market Watch settings are workspace-specific.
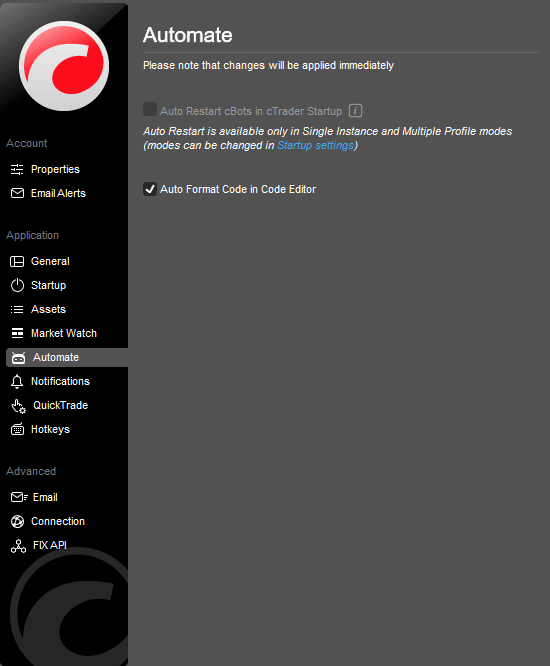
Algo
The Algo settings section allows enabling the Auto format code feature in the cTrader Algo cBots (trading robots) code editor. See the cTrader Algo section for more information.
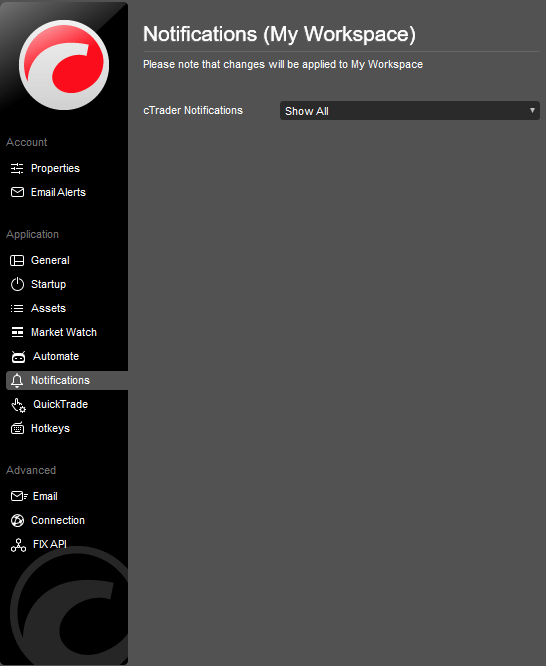
Notifications
Notifications settings allow enabling or disabling all event pop-up notifications in the app. By default, all notifications are enabled, but you can choose to show only error notifications, the last notifications or disable all notifications.
Quick Trade
Quick Trade is a fast trading mode that allows creating orders, adding volume or reversing open positions with one click directly from Market Watch or the symbol chart. It is a one-step process with no confirmation required and is designed for faster trading. Click or double-click (depending on your settings) a Buy or Sell button in the chart or in Market Watch, or use the buttons in the Positions tab in the Trade Watch panel, to send the corresponding order or request.
By default, Quick Trade sends market orders with a single click. You can configure this in the Quick Trade settings by selecting single-click or double-click to set the mode, or disabled to turn Quick Trade off.
Select Close all positions without warning or Cancel all orders without warning if you want to perform mass-close or mass-cancel actions without an additional confirmation pop-up.
Market, stop and limit orders are available in Quick Trade mode. In the Order type settings section, select the relevant tab and configure the stop-loss and take-profit settings separately for each order type.

You can also narrow or widen the market range for market orders, change the stop order trigger and use trailing stop loss for all order types.
Note
You can create stop and limit orders directly in the charts by right-clicking and selecting the corresponding item from the submenu, with the price determined by where you click. Before first using Quick Trade, you must read and agree to its terms and conditions. Quick Trade mode is workspace-specific, allowing you to maintain different Quick Trade settings for different workspaces.
When done, click Apply to save changes.
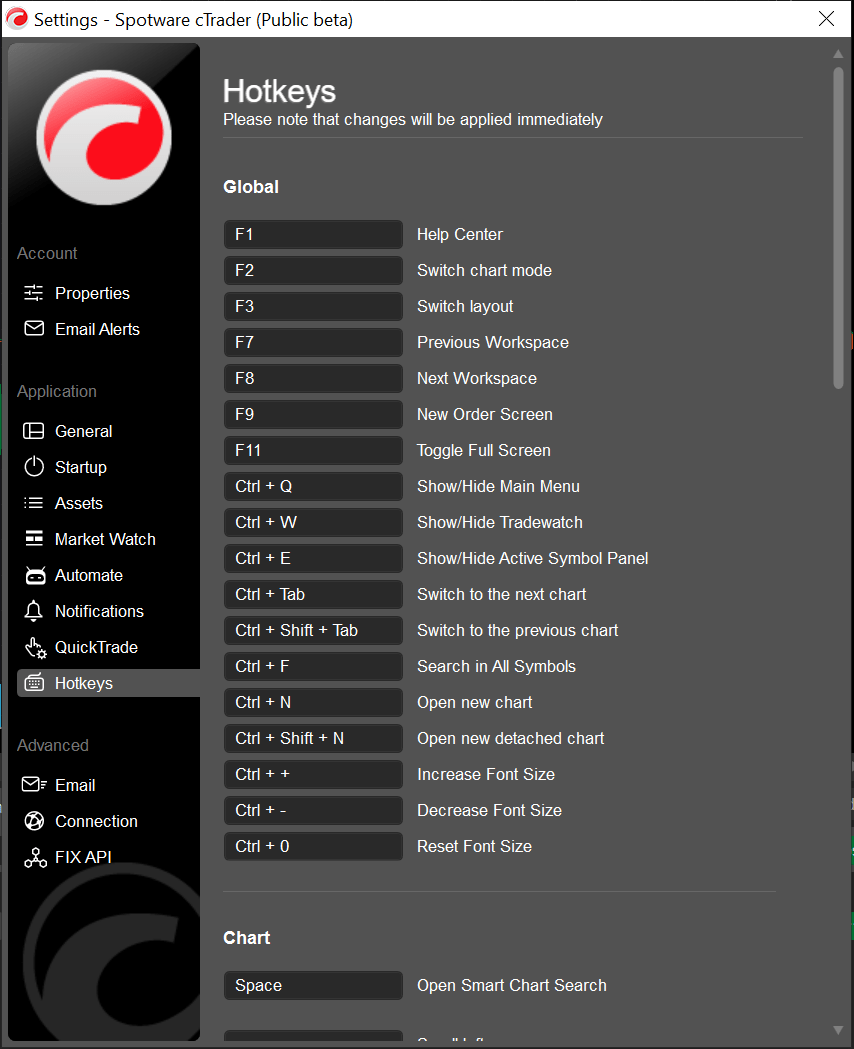
Hotkeys
Select Hotkeys to view all keyboard shortcuts available in the app. Hotkeys can significantly improve the speed and comfort of trading.
Note
You cannot customise the Hotkeys in the web version of cTrader.
Advanced
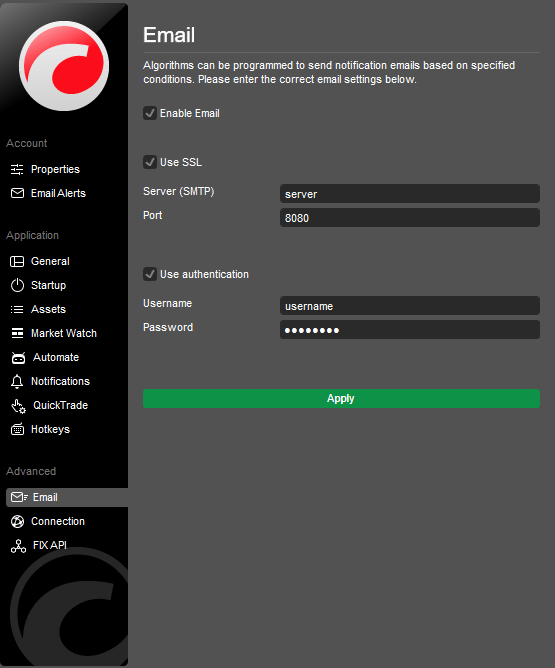
Email
The advanced email settings allow programming algorithms to send emails based on specific conditions. Check the Enable email check box to activate the advanced email settings, then enter the following:
- Use SSL – select if you are going to use SSL.
- Server (SMTP) – enter the server name (obligatory).
- Port – enter the port number if prompted.
- Use authentication – select if you would like to set the authentication credentials. Enter the desired Username and Password in the respective fields.
When done click Apply.
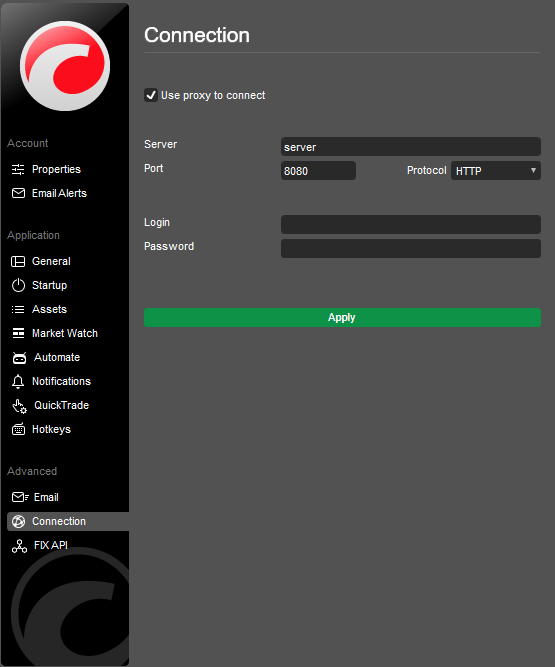
Connection
The Connection settings allow configuring a proxy server. Select Use proxy to connect to enable the proxy connection settings.
- Server – enter the server name (obligatory).
- Port – enter the port.
- Protocol – select the protocol from the drop-down.
- Login – enter the login.
- Password – enter the password.
When done click Apply.
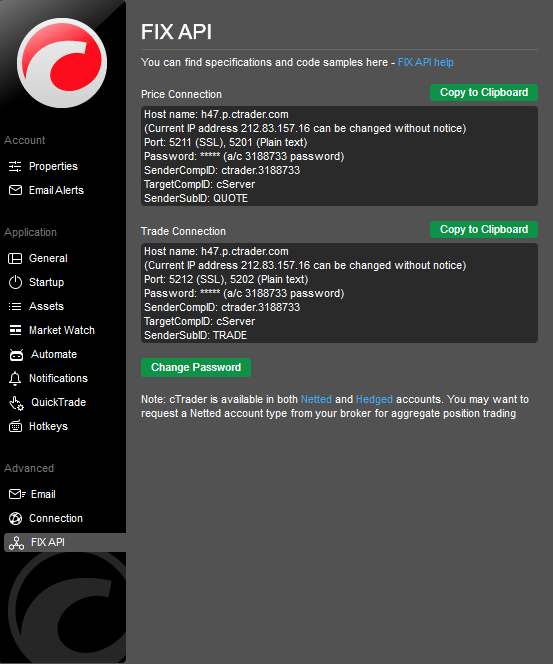
FIX API
FIX API is an industry-standard connection protocol for high-speed, efficient exchange of information. It enables traders to create their own trading systems and algorithms that make decisions based on information received from multiple sources.
In the cTrader FIX API settings section, you can access a direct link to the cTrader FIX API help page and copy the API connection credentials to connect your algorithm to the network.